13.表面着色器-实例分析-法线贴图
13.1 知识点
在表面着色器中使用法线贴图
主要步骤
- 新建表面着色器
- 删除无关代码
- 声明相关属性
- 检查编译指令
- 编写相关逻辑
创建表面着色器,删除无关代码
Shader "Custom/Lesson13"
{
    Properties
    {
        _Color ("Color", Color) = (1,1,1,1)
        _MainTex ("Albedo (RGB)", 2D) = "white" {}
    }
    SubShader
    {
        Tags
        {
            "RenderType"="Opaque"
        }

        CGPROGRAM
        // Physically based Standard lighting model, and enable shadows on all light types
        #pragma surface surf Standard fullforwardshadows

        // Use shader model 3.0 target, to get nicer looking lighting
        #pragma target 3.0

        sampler2D _MainTex;

        struct Input
        {
            float2 uv_MainTex;
        };

        fixed4 _Color;


        void surf(Input IN, inout SurfaceOutputStandard o)
        {
        }
        ENDCG
    }
    FallBack "Diffuse"
}
声明法线贴图属性,并进行映射
// 定义材质属性,在 Inspector 面板中显示
Properties
{
    //...
    _BumpMap("BumpMap", 2D) = "bump" {}           // 法线贴图
}
sampler2D _BumpMap;
检查编译指令
#pragma surface surf Standard fullforwardshadows  // 使用标准光照模型和全前向阴影
#pragma target 3.0                                  // 指定 Shader 模型 3.0
在输入结构体中添加反映纹理 UV:
// 输入结构体:包含顶点传来的 UV 坐标
struct Input
{
    float2 uv_MainTex;
    float2 uv_BumpMap;
};
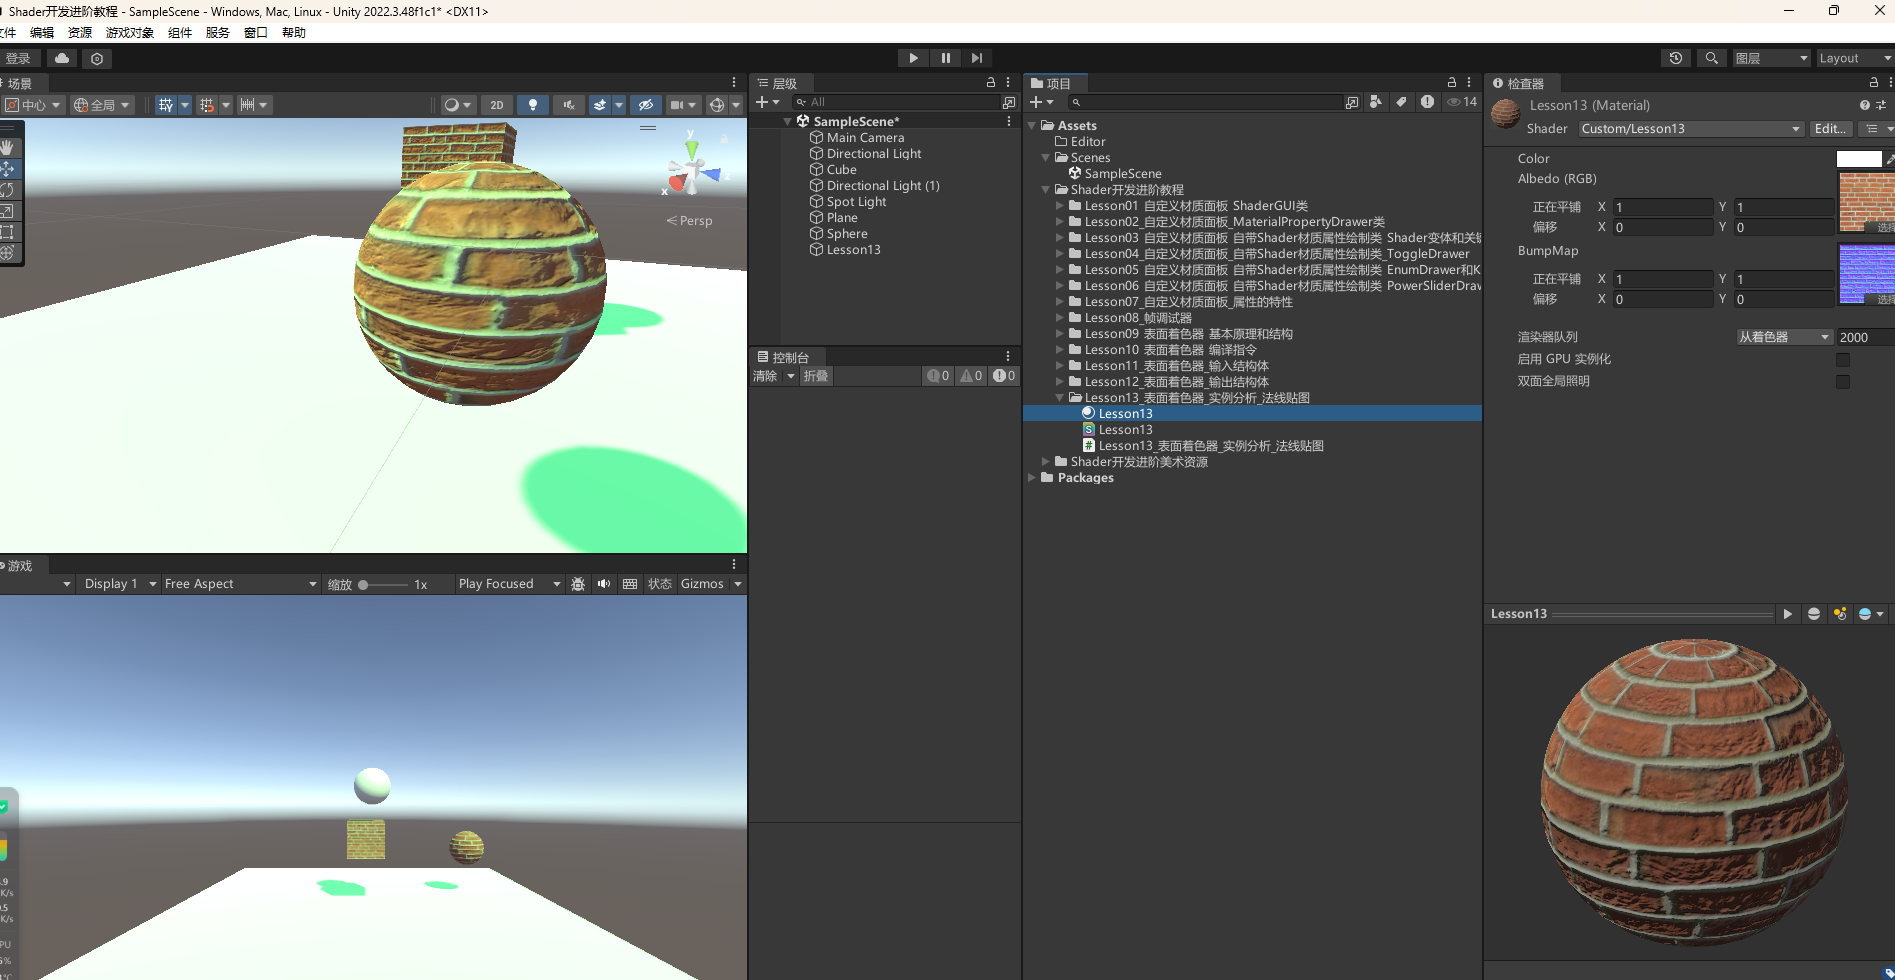
编写表面函数,设置基础颜色、漫反射颜色、透明度及切线空间下的法线
// 表面函数:计算最终材质效果
void surf(Input IN, inout SurfaceOutputStandard o)
{
    // 从主纹理采样基础颜色
    fixed4 texColor = tex2D(_MainTex, IN.uv_MainTex);

    // 漫反射颜色(纹理颜色 × 基础颜色)
    o.Albedo = texColor.rgb * _Color.rgb;

    // 透明度计算(纹理颜色 × 基础颜色)
    o.Alpha = texColor.a * _Color.a;

    // 从法线贴图解包法线,得到切线空间下的法线
    o.Normal = UnpackNormal(tex2D(_BumpMap, IN.uv_BumpMap));
}
可以看到效果
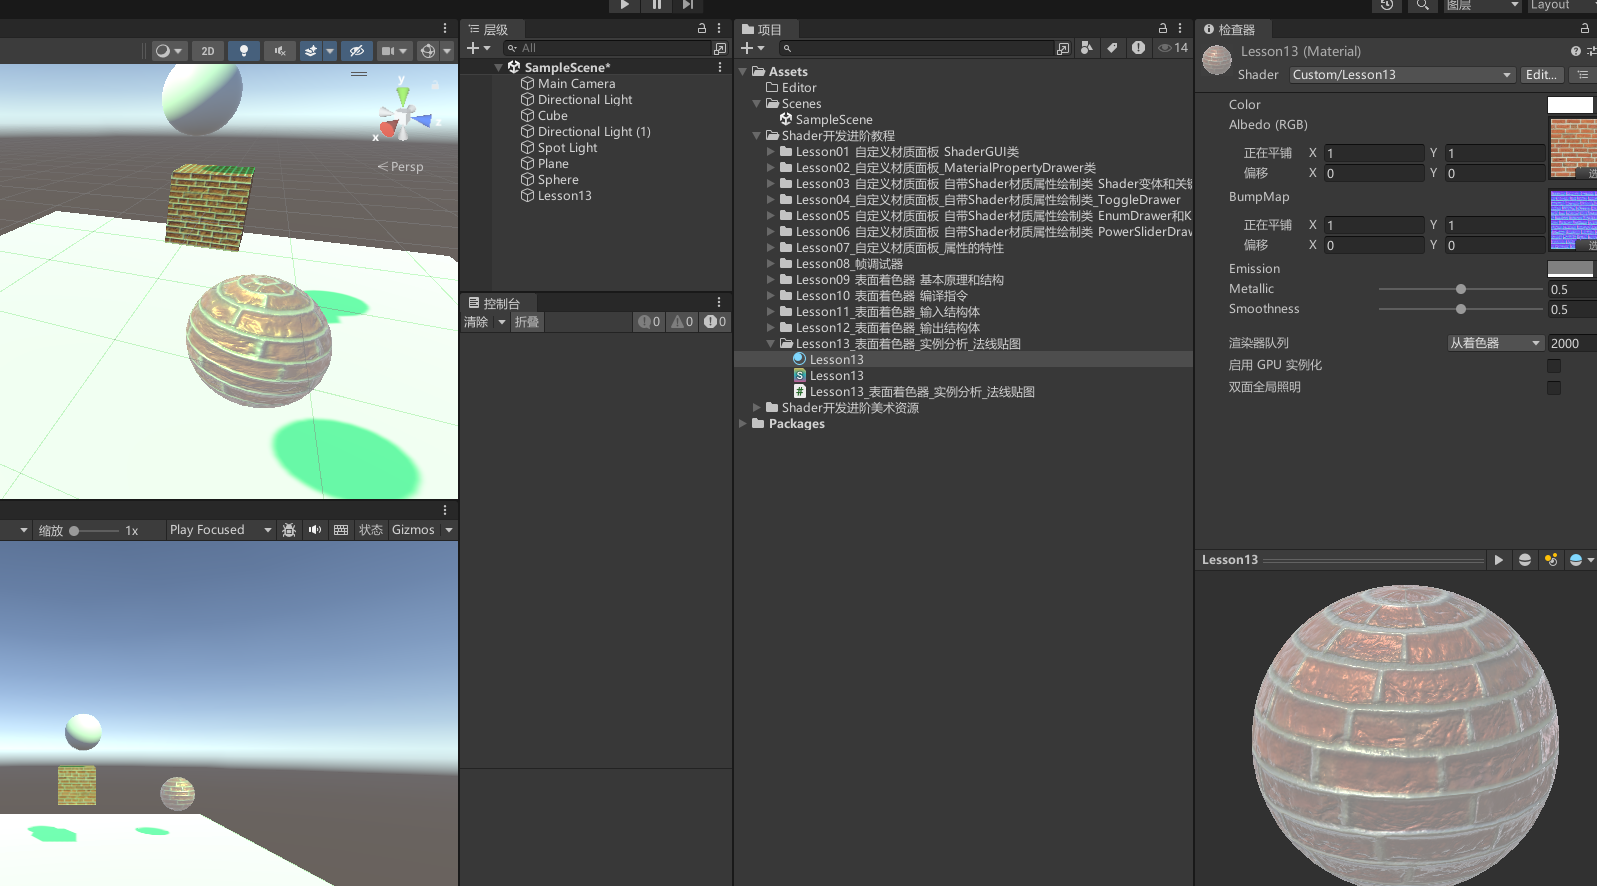
输出结构体相关参数的使用
我们可以用 SurfaceOutputStandard 的发光程度、金属度和平滑度来举例。
设置发光属性并添加映射
Properties
{
    _Color ("Color", Color) = (1,1,1,1)                   // 基础颜色
    _MainTex ("Albedo (RGB)", 2D) = "white" {}              // 颜色纹理
    _BumpMap("BumpMap", 2D) = "bump" {}                     // 法线贴图
    _Emission("Emission", Color) = (1,1,1,1)                // 发光
    _Metallic("Metallic", Range(0,1)) = 0                   // 金属度
    _Smoothness("Smoothness", Range(0,1)) = 0               // 平滑度
}
fixed4 _Emission;
fixed _Metallic;
fixed _Smoothness;
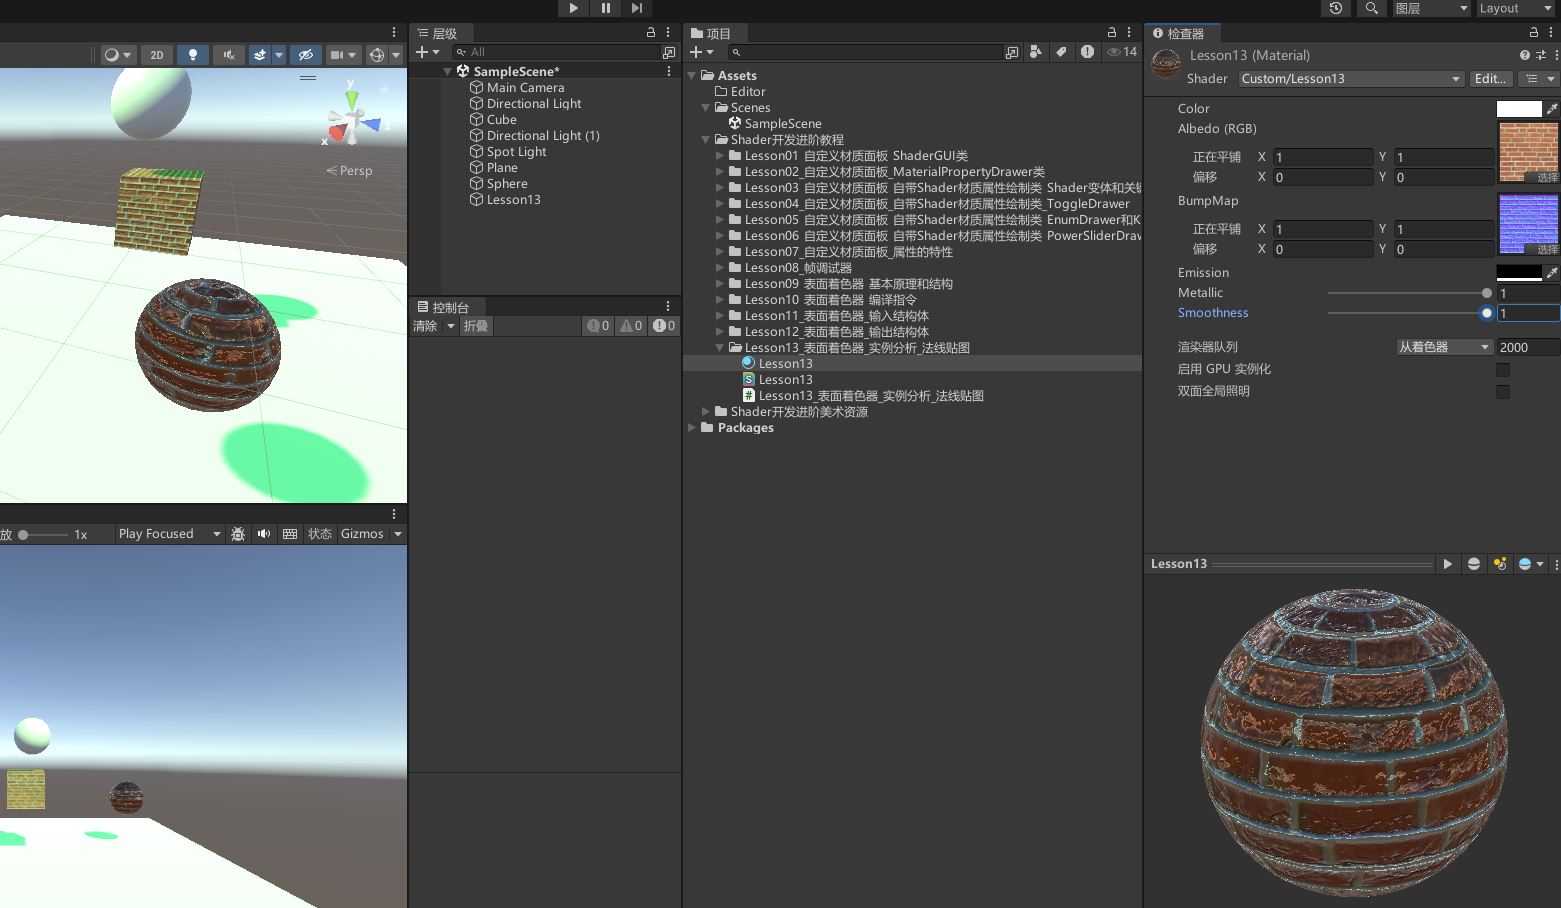
修改表面函数,设置发光效果、金属度和平滑度
// 表面函数:计算最终材质效果
void surf(Input IN, inout SurfaceOutputStandard o)
{
    // 从主纹理采样基础颜色
    fixed4 texColor = tex2D(_MainTex, IN.uv_MainTex);

    // 漫反射颜色(纹理颜色 × 基础颜色)
    o.Albedo = texColor.rgb * _Color.rgb;

    // 透明度计算(纹理颜色 × 基础颜色)
    o.Alpha = texColor.a * _Color.a;

    // 从法线贴图解包法线,得到切线空间下的法线
    o.Normal = UnpackNormal(tex2D(_BumpMap, IN.uv_BumpMap));

    // 设置发光效果、金属度和平滑度
    o.Emission = _Emission.rgb;
    o.Metallic = _Metallic;
    o.Smoothness = _Smoothness;
}
查看效果
13.2 知识点代码
Lesson13.shader
Shader "Custom/Lesson13"
{
    // 定义材质属性,在Inspector面板中显示
    Properties
    {
        _Color ("Color", Color) = (1,1,1,1) // 基础颜色
        _MainTex ("Albedo (RGB)", 2D) = "white" {} // 颜色纹理
        _BumpMap("BumpMap", 2D) = "bump" {} // 法线贴图

        _Emission("Emission", Color) = (1,1,1,1) // 发光
        _Metallic("Metallic", Range(0,1)) = 0 // 金属度
        _Smoothness("Smoothness", Range(0,1)) = 0 // 平滑度
    }
    SubShader
    {
        Tags
        {
            "RenderType"="Opaque"
        } // 设置为不透明材质

        CGPROGRAM
        #pragma surface surf Standard fullforwardshadows  // 使用标准光照模型和全前向阴影
        #pragma target 3.0                                 // 指定Shader模型3.0

        // 声明属性变量
        fixed4 _Color;
        sampler2D _MainTex;
        sampler2D _BumpMap;

        fixed4 _Emission;
        fixed _Metallic;
        fixed _Smoothness;

        // 输入结构体:包含顶点传来的UV坐标
        struct Input
        {
            float2 uv_MainTex;
            float2 uv_BumpMap;
        };

        // 表面函数:计算最终材质效果
        void surf(Input IN, inout SurfaceOutputStandard o)
        {
            // 从主纹理采样基础颜色
            fixed4 texColor = tex2D(_MainTex, IN.uv_MainTex);

            // 漫反射颜色(纹理颜色×基础颜色)
            o.Albedo = texColor.rgb * _Color.rgb;

            // 透明度计算 (纹理颜色×基础颜色)
            o.Alpha = texColor.a * _Color.a;

            // 从法线贴图解包法线 得到切线空间下的法线
            o.Normal = UnpackNormal(tex2D(_BumpMap, IN.uv_BumpMap));

            // 设置 发光效果 金属度和平滑度
            o.Emission = _Emission.rgb;
            o.Metallic = _Metallic;
            o.Smoothness = _Smoothness;
        }
        ENDCG
    }
    FallBack "Diffuse" // 当该Shader无法使用时采用Diffuse Shader
}
Lesson13_表面着色器_实例分析_法线贴图.cs
using System.Collections;
using System.Collections.Generic;
using UnityEngine;

public class Lesson13_表面着色器_实例分析_法线贴图 : MonoBehaviour
{
    void Start()
    {
        #region 知识点一 在表面着色器中使用法线贴图

        //1.新建表面着色器
        //2.删除无关代码
        //3.声明相关属性
        //4.检查编译指令
        //5.编写相关逻辑

        #endregion

        #region 知识点二 输出结构体相关参数的使用

        //我们可以用SurfaceOutputStandard来举例

        #endregion
    }
}
转载请注明来源,欢迎对文章中的引用来源进行考证,欢迎指出任何有错误或不够清晰的表达。可以在下面评论区评论,也可以邮件至 785293209@qq.com

